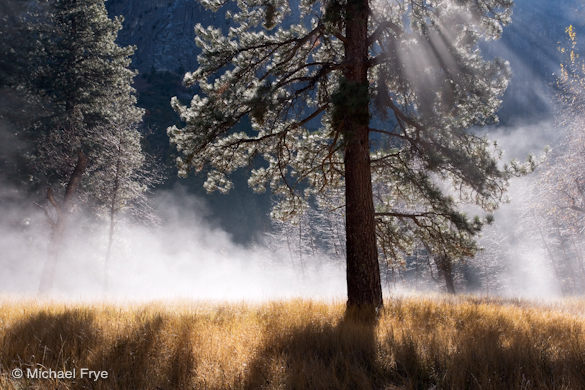
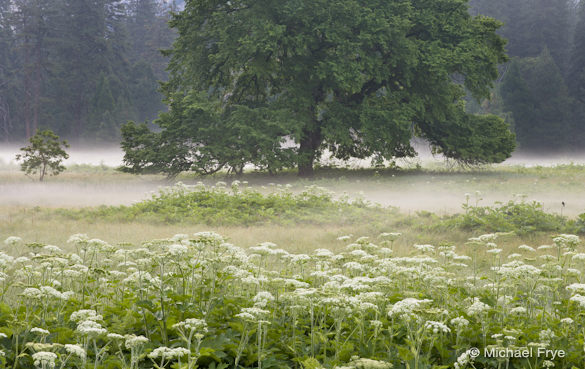
Understanding how to read a histogram is the best way to judge exposure in high-contrast scenes like this.
With film, exposure always involves some guesswork—you can never be sure you made the correct exposure until you develop the film. But with digital cameras you can tell immediately whether the right amount of light reached the sensor by looking at a histogram. This ability to instantly evaluate exposure is a game changer—the single biggest advantage of digital photography over film.
But many photographers are still guessing about exposure because they’re unable to decipher the histogram’s cryptic messages. Instead they judge exposure by how bright the image looks on their camera’s LCD screen. But while those little screens are extremely useful for many things, evaluating exposure isn’t one of them. There are too many variables: screen quality (usually bad), the LCD brightness setting in the camera, and the amount of ambient light.
A histogram is a much better way to judge exposure—if you know how to read it. If you haven’t figured out how to display a histogram on the back of your camera, you’ll have to spend some quality time with that fascinating book, your camera’s manual. Once you know how to view a histogram, what does it mean?
What Does It All Mean?
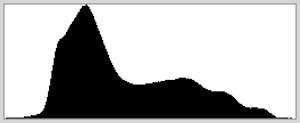
A histogram is a pixel map. It shows how dark and light pixels are distributed within your photograph—light pixels are on the right, dark pixels on the left. The shape of the histogram doesn’t matter. In other words, don’t worry if parts of the histogram shoot off the top, or whether there’s a spike somewhere in the middle. The only things that matter are the right and left edges.
If any pixels are pushed up against the right edge, that means parts of the image are overexposed—washed out. If any pixels are pushed up against the left edge, that means parts of the image are underexposed—black. Most cameras also have an overexposure warning—commonly known as the “blinkies”—where overexposed parts of the photograph flash or blink. Some cameras also have an underexposure warning, which shows underexposed, black shadows.
Handling High-Contrast Scenes
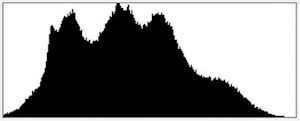
A properly-exposed medium-contrast scene, with nothing pushed up against either end of the histogram.
In most scenes you should be able to get detail in both highlights and shadows. That is, the histogram shouldn’t touch either the right or left edge. But in some situations the contrast is too great for the camera’s sensor to handle, so it’s impossible to avoid either washed-out highlights (a spike at the right edge of the histogram) or black shadows (a spike at the left edge of the histogram), or both. In these cases, it’s usually better to retain detail in the highlights and sacrifice shadow detail. In looking at a histogram, it’s better to have pixels pushed up against the left edge than the right edge.
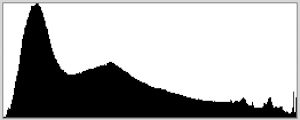
Histogram for a high-contrast scene with a spike at the right edge, indicating overexposed highlights.
Why are highlights usually more important than shadows? First, our eyes are drawn to bright areas, so viewers immediately notice if they’re overexposed. Second, in real life we can always see detail in bright spots (except when looking at the sun itself, or the sun reflected in water or glass), but we can’t always see detail in shadows. It seems unnatural to find washed-out highlights in a photograph, yet it feels perfectly normal to see regions of pure black.
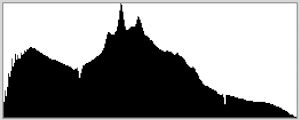
Histogram for a high-contrast scene with pixels pushed up against the left edge, indicating underexposed shadows, but properly exposed highlights. In most cases this is preferable—if you can’t get both, it’s better retain detail in the highlights and let the shadows go black.
So if you can’t have both, 99 percent of the time you should sacrifice the shadows and keep the highlights. In most photographs, the lightest pixels should be close to the right edge of the histogram, but not touching it.
The Short Answer
This bears repeating: most of the time, the lightest pixels should be close to the right edge of the histogram, but not touching it. If there’s a large gap between the lightest pixels and the right edge of the histogram, the photograph is underexposed. If any pixels touch that right edge, the photograph is probably overexposed. For most photographs, all you have to do is make sure the lightest pixels don’t touch the right edge, but are near it.
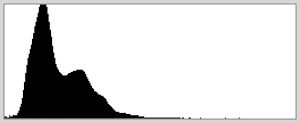
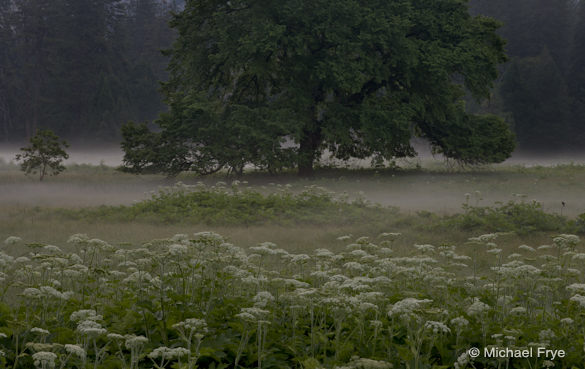
Underexposed—the brightest pixels aren’t close to the right edge of the histogram:
Overexposed—a spike at the right edge of the histogram:
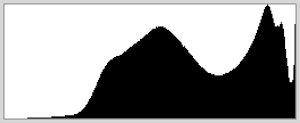
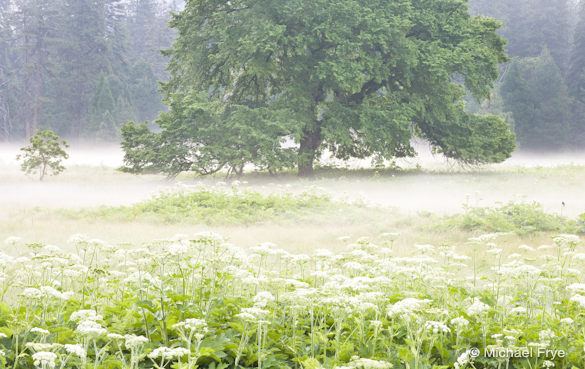
Proper Exposure—the brightest pixels near, but not touching, the right edge of the histogram:
The main exception, the instance when it’s okay to see a spike at the right edge of the histogram, is when the photograph includes the sun itself, or bright sky next to the sun. Because small areas around the sun are too bright to see in real life, it’s acceptable if such areas lack detail in photographs—it looks natural. The blinkies come in handy here: while the histogram tells you that something is overexposed, the blinkies show which parts of the image are washed out, and how large those areas are.
Adjusting the Exposure
So now that you can read a histogram, what do you do? If you take a photo, but the histogram doesn’t look right, how do you fix it? The short answer is that in automatic exposure modes like Program, Aperture Priority, or Shutter Priority, you need to use your exposure compensation dial to make the photograph lighter or darker. In Manual exposure mode you can change either the shutter speed or the aperture. I’ll explain exactly how to do this in the next installment of this Basics series.
Your Thoughts
I always welcome your comments and questions. Was this helpful? Do you always use histograms to check your exposure? Sometimes? Never? And if anything in this post isn’t perfectly clear, please let me know!
Naturally there’s more to the story. In some high-contrast situations I’ll bracket exposures so I can blend them together later in software, retaining detail in both highlights and shadows. And with colorful subjects, it’s important to look at the histograms for the individual color channels. For a more comprehensive look at exposure and histograms, please check out my ebook, Exposure for Outdoor Photography.



very useful and informative article – I have just purchased a Pentax 645d (in favour of a Canon 1Ds Mk 3) expressly for landscape photography. I have used a Bronica ETRSi, generally with Fuji Pro 160 colour negative film and, more often than not, a ND grad Lee filter; stunning results most of the time and I took a leap of faith to move to digital, so the jury is still out on the wisdom of my decision.
I confess to relying on the image in the LCD screen and have rather regarded the histogram as a “bit of a nuisance”!!!!! – not any more – this single article will probably enhance my photography and the results of my endeavours more than any other single piece of information. Very many thanks for sharing this invaluable knowledge.
Kind Regards, Chris Sellers, Lyme Regis, Dorset, England.
Thanks very much Chris – glad you found this helpful. Hope your transition to digital goes well!
One thing you could point out in this post – as you doubtless have in others – is that with underexposed portions of an image it is relatively easy to conjure up some detail in post processing but with blown highlights it is impossible. So if you HAVE to err, or have erred and cannot reshoot, under is savable, over is not.
Thanks for chiming in Colin. With Raw files from most cameras you can actually recover overexposed highlights, as long as they’re not too blown. And while there is often a lot of shadow detail that can be pulled out of underexposed images, it’s easy to also pull out a lot of noise in the process. So personally I try not to err on either side.
This was a great lesson in proper exposure. I must rely more on the histogram when I am taking photos. I am an amateur photographer! Now that I am retired from a teaching career, I have time to concentrate on something that I have always loved–photography! Thanks for your wonderful tips. I always love seeing your photographs. All of them have stories to tell.
Thanks Patsy – I’m glad you found this helpful, and I hope you get to spend lots more time on photography!
Thanks Michael for this fine basic post on the histogram. I know that you use the zone system in many of your shots, but do you spot meter most of your shots to determine the difference in the dynamic range of your image, so that you can determine if you have to bracket with either the use of exposure compensation or in manual mode increase exposure with shutter speed or do you just know through experience when you have to bracket any scenes. I would think that you have a pretty good idea when you have to bracket your shots, but I would guess for most of us it would be better to spot the highlights and shadows to make our determination.
John
John, you’re welcome, and thanks for the kind words. I don’t actually spot meter both highlights and shadows – just highlights. In most cases if you place the highlights correctly everything else falls into place. But I always check the histogram, and if, after getting a good exposure for the highlights, I see something pushed up against the left edge of the histogram (this would happen in a high-contrast scene), I’ll make an exposure one stop lighter, and if that’s not enough I’ll go another stop lighter, and so forth, until I see a gap between the darkest pixels and the left edge of the histogram. This ensures that I have both highlight and shadow detail, and can blend two or more of these exposures together later if necessary. Using the histogram this way is more accurate than using any meter.
The Zone System is a great way to get to the right exposure quickly, and I still use it for that purpose, but a histogram is even more useful than any meter, and I rely on that more than light meters.
Thank you, Michael, for this post on the histogram. I am using a digital Canon and knew the histogram was there, but had forgotten my lessons in college. Probably because it was all film then. 😉 You have given me that information in a way that I really get it now. Therefore, I will be watching that histogram all the time.
You’re welcome Jeanette! Glad you found this helpful.
Thank you for sharing your knowledge. I have never used histograms before, but now I am going to use it. I am new to photography. I have been reading your blog and watching your YouTube channel, they are very helpful. Thank you so so much!
Thanks for your comments Chuen – I appreciate the kind words, and I’m glad you found this helpful
I cannot tell you how much I appreciate your Basic Info on Digital Photography. I took up photography later in life (69) and it is one of my most fascinating and humbling experiences. My successful capture of a great scene was similar to the proverbial finding of an acorn by the blind squirrel. I am thankful to have found your blog where the info provided is concise yet thorough and understandable by a neophyte. I took a course where the instructor actually told us to ignore the histogram so please for the sake of we less experienced and knowledgeable keep it up.
Thanks very much Lucian! I’m glad you’re finding this information helpful — that’s what it’s all about.
Hi- just subscribed after reading your fantastic article in Outdoor Photography, Power of Visualization. I am puzzled by technique used for Thunderstorm. I follow it through the steps, “…a continuous series of 20 second exposures for 2 hours. ” Then , you state, “All 13 frames were blended together in Photoshop using the Lighten blending mode and layer masks.” Is there a video reference or other reference on how I can do this?
Dale, I’m glad you liked the article, and thanks for subscribing. At answer your question, first, I didn’t use every frame that exposed during those two hours – only the ones that recorded lightning strikes. I don’t have a video or any other instructional material about how to blend images in Photoshop using the Lighten blending mode, but I’m sure there has to be something out there in the vast reaches of the internet!
Thank-you so much for this. I’m like a new born baby in the field of photography and do not know anything beyond the fact that I love landscape photography. And until today histograms were a nuisance to be ignored. Thank-you so much! Learned a lot!
Glad this was helpful!
In a high contrast scene, if your histogram does not touch the left or right side do you ever bracket the scene ? If yes why and when ?
Thank you !
Thanks for the question Orlin. No, I wouldn’t bracket if I could get detail in both highlights and shadows with one exposure – there’s no need.