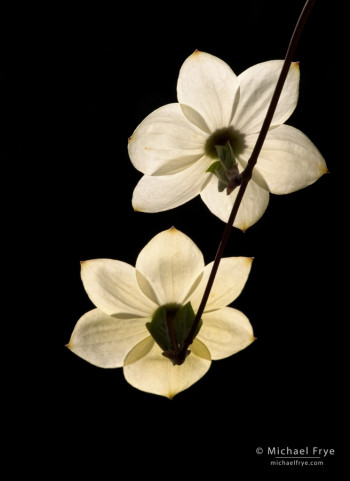
Dogwood blossoms, Yosemite. These backlit flowers stand out cleanly against a dark, shaded background.
Light Against Dark
Many of the most effective photographs share a simple lighting concept: they either place a light subject against a dark background, or a dark subject against a light background.
This first photograph of two dogwood blossoms is a perfect example of a light subject against a dark background. In fact the background isn’t just dark; it’s completely black, so there’s nothing to compete visually with the flowers. The contrast creates a simple and dramatic image.
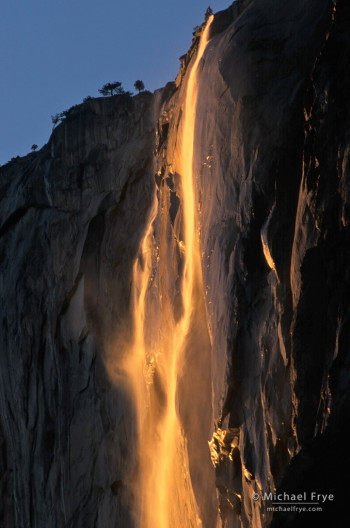
This light-against-dark situation is what makes photographs of Horsetail Fall so striking when conditions are right. The waterfall stands out because it’s brighter than the surrounding cliffs – and, of course, because of the color.
Dark Against Light
The opposite scenario – dark against light – can be equally effective if the subject has an interesting shape. Since the dark subject will probably appear as a silhouette, all the viewer will see is its outline, so that shape has to be compelling.
This photograph of gulls on an abandoned pier has long been one of my most popular images, and a big reason for its popularity is the simple, clean contrast of dark shapes against a light background. (The background is water with sunlight reflecting off of it.)
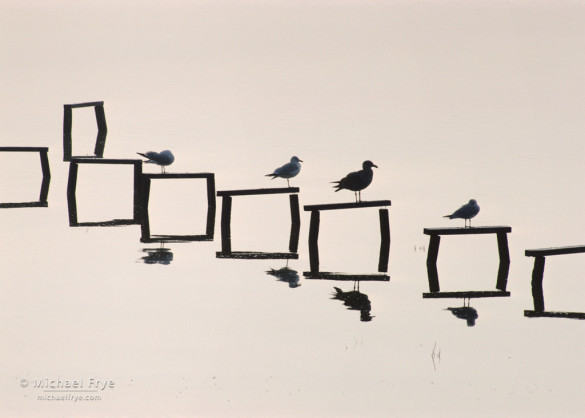
Gulls on an abandoned pier, Mountain View Shoreline Park, California. A classic dark-against-light silhouette.
Mixtures
Most photographs aren’t as simple as these three examples; they usually have a mixture of light-against-dark and dark-against-light. The important thing is that the key elements of the composition must stand out against their surroundings.
This photograph of El Capitan has dark-against-light silhouettes of the trees and their reflections, but El Capitan and its surrounding clouds are bright areas juxtaposed against the darker sky and trees. Yet either way, all the key elements and shapes stand out clearly. In fact the image can be seen as bands of light and dark areas, with a dark band at the top, then a light band, another dark band, another light band, and then a dark triangle in the lower-left corner.
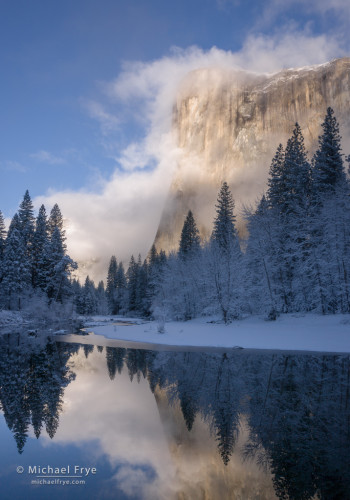
Clearing storm, El Capitan and the Merced River, winter, Yosemite. This image has both light-against-dark and dark-against-light juxtapositions.
Finding Contrast
While the concept of juxtaposing light against dark or dark against light is easy to grasp, finding these situations is more difficult. The most important step is just to realize the power of these lighting conditions, and look for them. Also, remember that the low-angle light just after sunrise and just before sunset creates the greatest contrast and cleanest juxtapositions.
Dark-against-light silhouettes appear most often with backlight (looking toward the sun), as with the photograph of gulls on a pier above. But some of the most interesting silhouettes occur with a shaded foreground object against a frontlit background. This image of a Joshua tree was made just after sunrise. The sun had reached the rocks in the background, while the tree was still shaded by a small ridge behind me. Minutes after I made this photograph the sun hit the Joshua tree, and the contrast was gone.
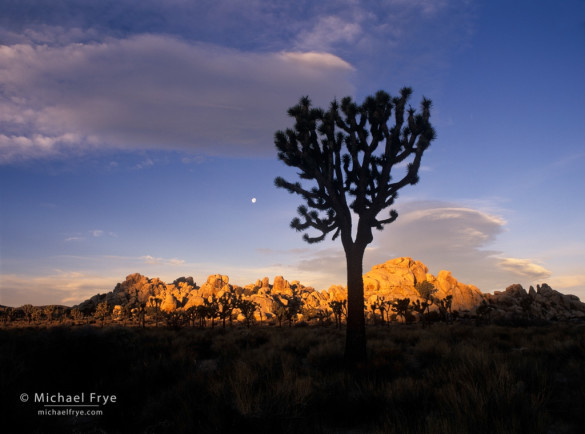
Joshua tree with moon at sunrise, Joshua Tree National Park, California. A frontlit silhouette, with the shaded tree against a sunlit background.
Backlight can also create the opposite effect – light-against-dark – when the subject is translucent. Placing a backlit, translucent subject against a shaded background creates strong contrast, as we saw in the first two images here of the dogwood blossoms and Horsetail Fall.
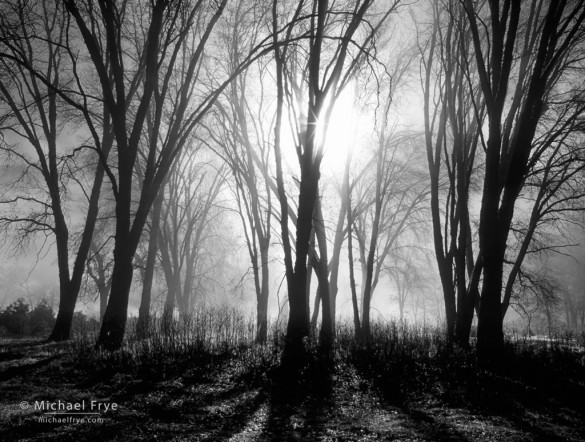
Light-against dark situations also frequently occur with low-angle sidelight, where the sunlight rakes across an object, but leaves the background in the shade, as in this photograph of cottonwood trees along the edge of the Merced River. I accentuated the contrast by deepening the blacks in Lightroom.
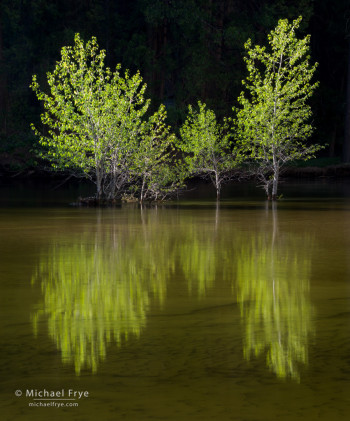
Cottonwood trees in the Merced River, Yosemite. Sidelight illuminated the tree while leaving the background in the shade.
The Edge of Light
In short, you’re looking for what my friend G Dan Mitchell calls “the edge of light,” where sun meets shade. Anytime you see this you’ve found a situation with great photographic potential.
Below you’ll find a few more light-against-dark and dark-against-light images, with brief descriptions of the lighting situation. And, as always, I welcome your input; if you’ve photographed a scene with this kind of strong luminance contrast, please post a link to the image in the comments!
And once again, I want to express my appreciation for the wonderful response to my new ebook, Landscapes in Lightroom 5. Thank you all so much! As I said in my previous post, we’ve extended the early-bird discount until midnight tonight, so you still have a chance to get 20% off on the ebook by using the code lr520 when you check out.
— Michael Frye
Related Posts: Photographing Reflections: Beyond the Mirror; Light and Mood With Intimate Landscapes
Did you like this article? Click here to get every new post delivered right to your inbox!
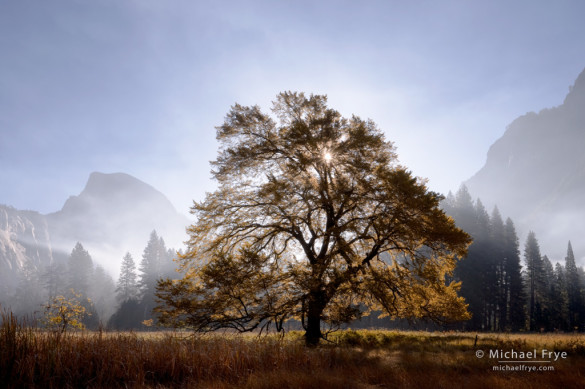
Autumn morning, Half Dome and elm tree, Yosemite. The main features of this image, like the trees and Half Dome, stand out as dark-against-light silhouettes. The lighting direction is obvious.
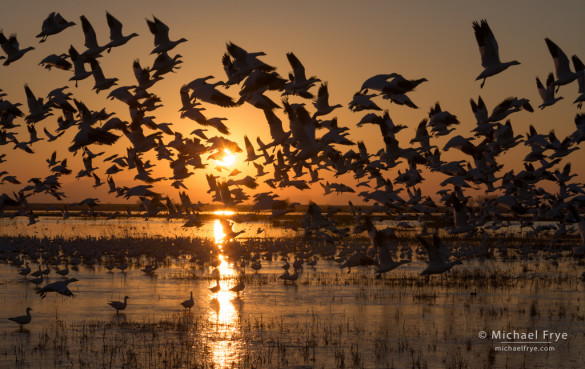
Ross’s geese taking flight at sunset, Central Valley, California. Lots of repeating shapes shown as silhouettes.
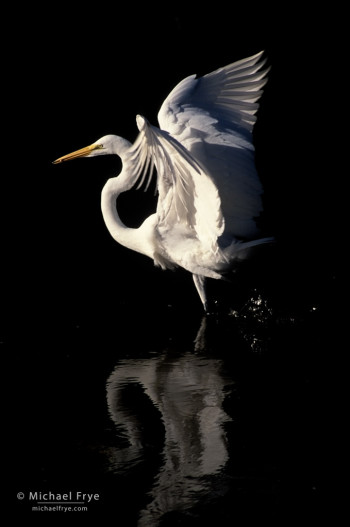
Great egret, Ding Darling NWR, Florida. Low sidelight illuminated the egret, but the edge of the pond behind the bird was in the shade, creating a perfect light-against-dark situation.
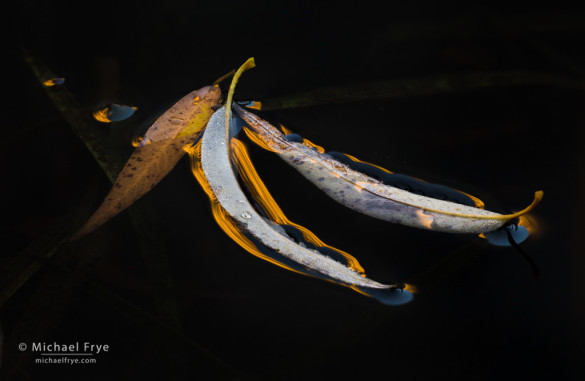
Willow leaves in a pond, Yosemite. The leaves and pond were in the shade, but the edges of the leaves were reflecting the golden color of a cliff at sunset. A polarizing filter helped to darken the water.
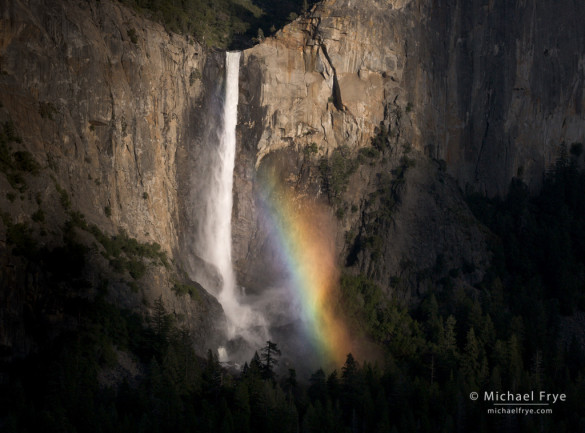
Bridalveil Fall and rainbow, Yosemite. Beams of sunlight were breaking through clouds and occasionally wandering through this scene. I waited and hoped for a moment like this, when the sun spotlit the fall and created natural vignetting.
Michael Frye is a professional photographer specializing in landscapes and nature. He is the author or principal photographer of The Photographer’s Guide to Yosemite, Yosemite Meditations, Yosemite Meditations for Women, and Digital Landscape Photography: In the Footsteps of Ansel Adams and the Great Masters. He has also written three eBooks: Light & Land: Landscapes in the Digital Darkroom, Exposure for Outdoor Photography, and Landscapes in Lightroom 5: The Essential Step-by-Step Guide. Michael written numerous magazine articles on the art and technique of photography, and his images have been published in over thirty countries around the world. Michael has lived either in or near Yosemite National Park since 1983, currently residing just outside the park in Mariposa, California.



Hello Mike:
What I like about these posts is that you sometimes take approaches that “other photogs” say do not make good pictures. I do those things sometimes based on artistic license and occasionally they are successful. Seeing you pull some of these things off gives me confidence to follow my vision.
Regards..Relishguy
Thanks Roger! Out of curiosity, what things in this post incorporate approaches that other photographers say won’t work?
Thanks for the new ebook Michael. I love all the examples and seeing your workflow through various images. Great work, great writing!!!
Thank you very much Jeremy — I’m really glad you like the book!
I shot this recently at Whitewater Draw in SE AZ during a photography workshop sponsored by SW Wings Birding and Nature Festival. The birds were uncooperative, and I was using a borrowed lens which I was not at all comfortable with. During the course of familiarizing myself with it’s idiosyncrasies I captured this. I subsequently created several iterations of this in post, but this is my favorite. I used NIK Silver Efex Pro 2 (Silhouette EV +0.5 I believe…), but I am sure I could have generated a very similar image in LR using the tone curve, and… after participating in Mike’s January workshop, I am sure I will know how to do so with confidence…!
http://bit.ly/188VUsj
The original, which I liked also, is in the same gallery to serve as a point of reference.
This might prove more accessible to those reluctant to “register” on my site. It also includes a bit more context on the shot…:
https://plus.google.com/u/2/112083465884057845977/posts
Jerry
Thanks for sharing that image Jerry. I like it’s zen-like simplicity, and it’s a good example of dark-against-light.