It rained here on Friday night and Saturday morning. The storm cleared Saturday afternoon, so once again I drove up to Yosemite Valley. Unfortunately clouds closed in and muted the light at sunset, but I decided to wait. I remembered a dusk photograph I made from Tunnel View a couple of years ago (the top image in this post), and thought the same light might occur again.
Well lightning didn’t strike twice, and the dusk light wasn’t that interesting. But again I decided to wait. I knew there wouldn’t be any moonlight, but interesting mist was floating around the valley, and I thought starlight might be enough to illuminate some scenes, with perhaps some additional help from car headlights.
I ended up photographing around Yosemite Valley until 9:30, almost five hours after sunset. It was just too much fun. I would think about heading home, then think, “Well maybe I’ll just check out this one spot,” and end up staying there for an hour or two.
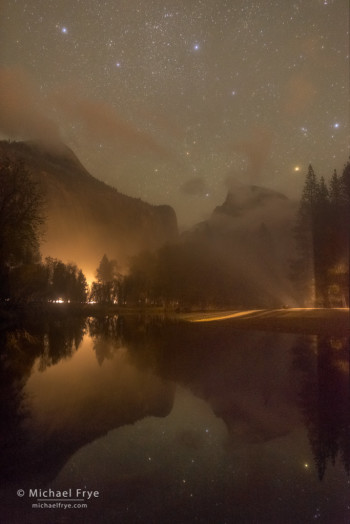
Sometimes I looked for locations where car lights might illuminate the fog, like the scene with Half Dome above. A steady stream of traffic on Northside Drive made the mist on the left side of the frame glow. Then during one exposure a car pulled into the parking lot behind me, lighting the riverbank and trees on the right side of the frame. I can’t explain why the light beams seem to radiate upward off the sandbar. Something about the way the light reflected off the water? I don’t know, but it was cool.
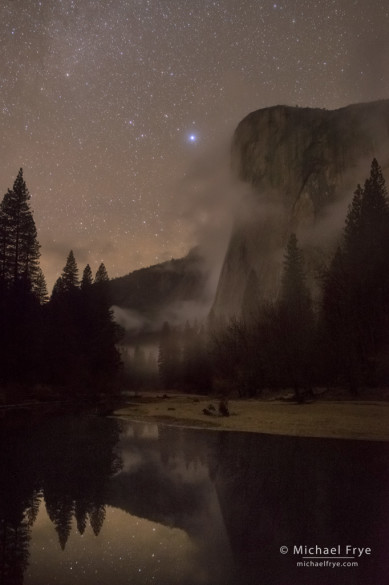
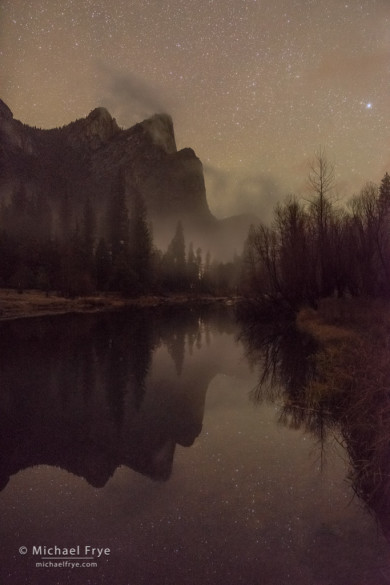
The photograph of Three Brothers below also benefits from car lights. It’s subtle, but the mist underneath Three Brothers is faintly illuminated by headlights, which I think adds to this image. The photograph of El Capitan, on the other hand, was lit exclusively by the sky – stars, and perhaps a little light pollution or airglow.
As I said, this was a really fun night. I’ve been to all these spots many times, and occasionally have been fortunate enough to photograph them with great light and weather conditions, but I’d never photographed these scenes during a clearing storm lit only by stars and headlights. It was a reminder of why I love photography so much. What other activity would encourage you to go out and witness a clearing storm by starlight – and also engage your imagination and make you push yourself creatively?
— Michael Frye
P.S. I’m sure some of you would like to know the technical details for these images, so here goes:
With my 24mm lens I usually expose starry skies for 20 seconds at f/2.8, 6400 ISO. These settings are compromises. I’d like to use a longer exposure to add more light and show more stars, but then the stars would move and become streaks. I’d like to use a lower ISO, and could do that if I opened up the aperture to f/1.4 or f/2, but my Rokinon 24mm lens is sharper in the corners at f/2.8. (And this is a great lens; most lenses are even worse at wide-open apertures.)
But with these photographs I knew the water reflections would be too dark at my standard exposure, and lightening the water in software would bring out a lot of noise. So for every scene I made two exposures, each for 20 seconds at 6400 ISO, but one at f/2.8, and one at f/1.4. I then blended the two exposures together in Photoshop, using layer masks. In each of these photographs, most of the final image is from the f/2.8 exposure, so it’s nice and sharp, but I blended in the water from the f/1.4 exposure. Since it’s only water, sharpness is less important, and since I didn’t need to lighten it there’s less noise.
This might all sound really complicated, but I’d done things like this before, and didn’t have to think about it too much. It was actually easy to relax and enjoy the beautiful evening during each 20-second exposure.

El Capitan and the Merced River at night, with Vega (bright star) and the Lyra constellation, Yosemite
Related Posts: Storms at Last! Six Images From Tunnel View; Stars Over Three Brothers
Did you like this article? Click here to subscribe to this blog and get every new post delivered right to your inbox!
Michael Frye is a professional photographer specializing in landscapes and nature. He is the author or principal photographer of The Photographer’s Guide to Yosemite, Yosemite Meditations, Yosemite Meditations for Women, Yosemite Meditations for Adventurers, and Digital Landscape Photography: In the Footsteps of Ansel Adams and the Great Masters. He has also written three eBooks: Light & Land: Landscapes in the Digital Darkroom, Exposure for Outdoor Photography, and Landscapes in Lightroom 5: The Essential Step-by-Step Guide. Michael has written numerous magazine articles on the art and technique of photography, and his images have been published in over thirty countries around the world. Michael has lived either in or near Yosemite National Park since 1983, currently residing just outside the park in Mariposa, California.


Michael, these are amazing, and inspiring. Some of my favorite photos of yours, ever.
Thanks so much Lance! That means a lot coming from such a nighttime master. I’m having fun with new tools – it’s amazing to be able to push up the ISO so high and get decent results.
Michael, Went to Yosemite last month and tried night photo after reading your articles. Thanks for the inspiration. Three brothers was my favorite spot during the day and The view at Glacier point at night was unbelievable. I left my heart at Yosemite and I hope to get it back soon!
Sean, I’m glad you got to try some night photography in Yosemite. Sounds like you had fun!
I love your night work, Michael…! I have a 24-70 Zeiss lens on my Sony a7R, but it only opens up to f/4. I have been looking at the Rokkinon 14mm for night work. Do you have an opinion on that lens?
Thanks Jerry. I haven’t tested the Rokinon 14mm myself. My friend Robert has one, and he seems to like it. It’s cheap! I may get one at some point, since I’d like something wider than my 24mm sometimes for night work. But the 14mm is an f/2.8 lens, so it has to be sharp wide open, and as I said, I haven’t tested it myself, though I’ve seen some good reviews.
Love these images Michael, especially the last two. I agree with Lance, close to my favorite. A couple of questions: was this taken with your Canon or Sony body? Am I correct in assuming you’d lose a couple of stops using an adaptor on the A7r?
Thanks very much Robert. I only use the Sony these days. I didn’t use an adapter for these photos, since the Rokinon lens has a Sony E-Mount, but you don’t lose any light by using an adapter. That would only happen if the distance between the lens and sensor was increased, and that isn’t the case. The reason there are so many adapters available for the the Sony E-Mount cameras is that the sensor is very close to the mount compared to Nikon or Canon SLRs, so there’s plenty of room to fit an adapter between the lens and camera body yet still maintain the same distance between the glass and the sensor. In fact Metabones makes a “speed booster” adapter, which is thinner than their regular adapter. Since the lens-to-sensor distance is actually shorter, this adapter actually increases the maximum aperture by one stop (and also shortens the focal length of the lens).
Got it. Thanks. I wasn’t aware that this was a E mount FF lens. Which begs another question: are you considering getting the FE 16-35 lens just released or are you happy with your Canon equivalent on an adaptor?
I’m not happy with my Canon 17-40 f/4 lens, not because of the adapter, but because it’s a crappy lens. So I am considering getting the FE 16-35, or the new Canon 16-35 f/4. But I have other lens priorities at the moment, so that’ll have to wait.
Michael-
These are AWESOME images. I’m really impressed with your work, and it is a source of
inspiration for me.
Thanks for posting.
Thank you Bill!
Michael, I love the ethereal quality of these images; the fact that you had so much fun shooting them really shows through! Just gorgeous!
Thanks Beth! Your statement actually brings up a (sort of) serious point, because I think everyone makes better photos when they’re having fun, or moved by the scene or moment in front of them. Your mental and emotional state comes through in your photographs somehow.
Thanks so much for all the technical details Michael. It’s Very helpful and appreciated. The information is interesting. And it’s inspiring. (Excect, although I could ‘do’ that, somehow I can’t quite ever Do what you Do!!! =))
Thank you Lynette!
Beautiful set of images Michael. Looking at your blog always inspires me to capture more images. In fact I have tried to imitate your photos many times 🙂
Thanks Chinniah! I don’t mind the imitation, that’s how you learn.
Really great stuff here Michael. I finally got it to the Tetons and Yellowstone this fall and planning my first visit to Yosemite next year. Looks like I am going to be a student of your work after seeing your blog.
Thanks Michael! Yellowstone and the Tetons are great, and I’m sure you’ll enjoy Yosemite too.
Its nice to see and hear you got a clear sky. the photos are stunning. also the stars look so bright to. nice pictures.
Thank you Canvas!
Michael, thank you very much for sharing your wonderful shot.
Happy Thanksgiving~~!!
Thanks Eunice, and Happy Thanksgiving to you too!
It sounds like you had a ton of fun, and these images show it. They are gorgeous, and a reminder how car lights can help and not hinder.
Hi Michael,
Fun post, good ideas. It particularly struck a note with me as this is what we did the night before our workshop with you. There was a mix of really clear stars with mist and clouds, so we went down to Valley View and tried some long exposures. I wish I’d thought of the two exposure approach. I did try a little light painting to get more out of the foreground:
http://www.castleintheair.com/PicturesForPosting/Yosemite-11-14/Yosemite-11-13-14-28-Edit.jpg
Something that is going to take a lot of practice to get a good handle on what makes a good picture.
Thanks Doug. I think your photo is very well done overall. In that case, making a lighter exposure for the foreground would have perhaps required a different approach, as you had a lot of detail, and depth of field to consider, so a wide-open aperture would make parts of the foreground soft. On the other hand, since you don’t have star reflections in the water, you could have used a longer exposure for the foreground. One tip about the light-painting – it usually works better to have the light coming more from the side, rather than right next to the camera, to give more texture and definition to the foreground. And in general, it’s difficult to work with really close foregrounds like this in night photos, because you want to stop down to get everything in focus, but that means using either longer exposures or higher ISOs.
Cool, thanks for the tips.
I really appreciate that you share your technical details. I learn so much from reading your blog. These Yosemite Valley shots are so familiar yet so unique. The two exposure approach to the dynamic range issue is perfect. I have been struggling with my Canon 24mm lens. Thought it would be sharper at the edges for night photography. Way too much aspherical distortion if I open it up wider than f2.8.
Thanks Katy. I’ve rented Canon 24mm f/1.4 lenses a couple of times, and unfortunately I wasn’t terribly impressed. Maybe they were just bad copies, but the the Nikon version I used was sharper in the corners, as is my Rokinon version (same lens is also marketed under Bower and Samyang).