Landscape photographers usually work alone, or with a few other people. Even during workshops, when we might have 10 or 12 photographers in the same general area, each person is usually working on their own compositions.
But in our night-photography workshops there’s often a lot more collaboration. It’s common for groups of people to work on photographing the same subject, taking turns with light-painting, and exchanging ideas about how best to light and photograph the scene. And often the collective wisdom produces some interesting ideas.
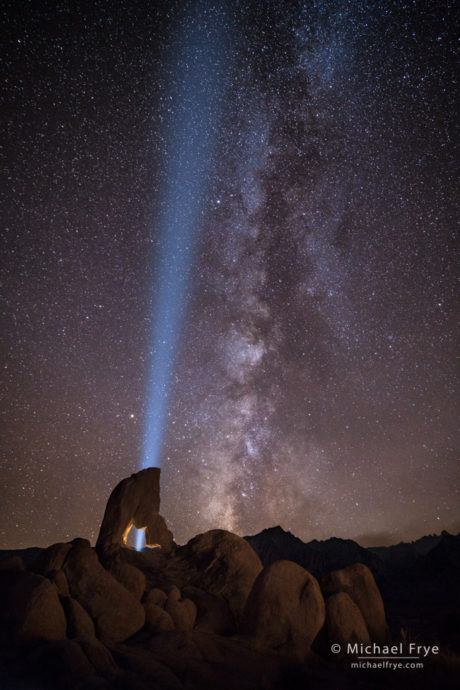
I had photographed this same arch in the Alabama Hills in August, and liked its unique shape, so I made it a point to bring our workshop group there in October. The Milky Way was nicely positioned just to the right of the arch, so we took some frames with just starlight, and then worked on lighting the scene. We lit the arch and foreground rocks from the right and the left, and then I scrambled around to light the underside of the arch from behind.
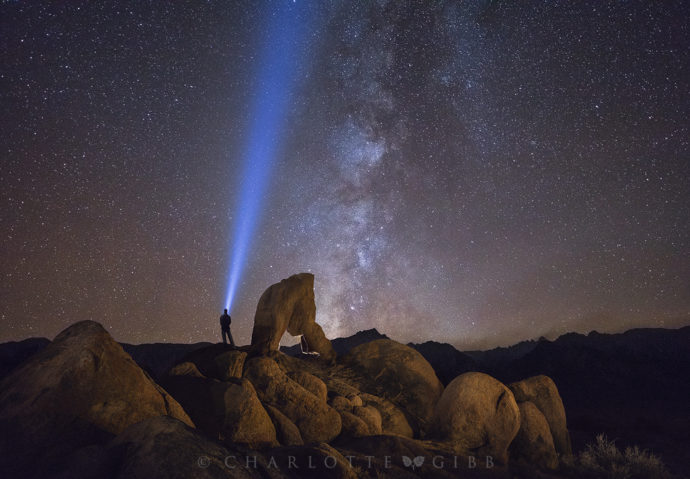
Next I asked if anyone had any other lighting ideas. And Charlotte Gibb, one of my assistants, asked if I could go behind the arch and point my flashlight up. We had tried this previously (at Charlotte’s suggestion) in the Trona Pinnacles, and it added an interesting element to the scene, so it seemed worth trying again. Luckily, as we had discovered, one of my flashlights created a beautiful blue beam when pointed up toward the sky. I tried this from several different positions behind the arch, and then stood next to the arch and put myself in the picture.
In my final version above I used one of the frames where I was standing behind the arch pointing the flashlight up toward the sky, rather than having my figure in the frame; not seeing the light source seemed to give the image a little more mystery. As with many complex light-painted photographs like this, the final image is a blend of different exposures. In this case I used one for the Milky Way, one with light on the rocks and arch from the right, one with the underside of the arch lit, and one of the frames with the flashlight pointing up from behind the arch. I used the Milky Way exposure as the bottom layer in Photoshop, and set the other layers to the Lighten blending mode, which merged the frames pretty seamlessly. I also reduced the opacity of some layers to make the lighting effect more subtle, and used layer masks to deal with stray light in unwanted areas.
Just for fun, here’s Charlotte’s version of this image, with my silhouetted figure next to the arch:
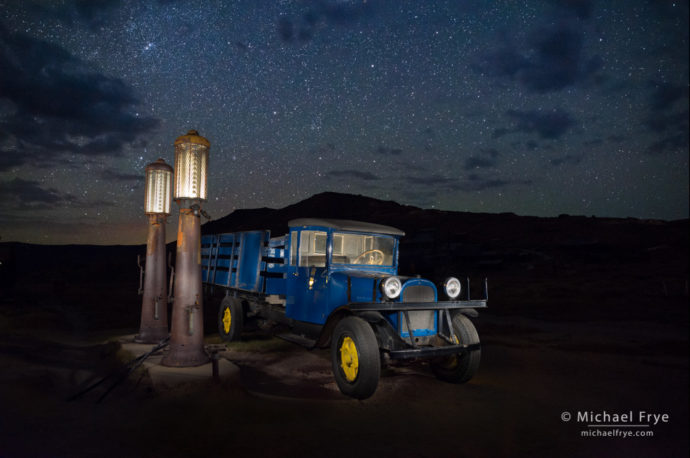
A similar collaboration occurred while making this next photograph last year in Bodie, when one person in our group suggested putting a light behind the glass containers atop the gas pumps. That hadn’t occurred to me, because I didn’t even realize those were glass containers! I think that touch added a lot to the final image:

1927 Dodge Graham with gas pumps at night, Bodie. Several of us took turns lighting this scene. One of the participants had the idea of putting a light behind the glass containers at the top of the gas pumps. We also lit the inside of the cab, and illuminated the truck from several different angles, but the main light in my final version here was from a continuously-moving flashlight close to the truck. A thick afternoon cloud cover dissipated quickly after sunset that night, but a few lingering clouds added some interest to the sky.
I usually find it easier to concentrate and focus when I’m alone, or just with Claudia. But group light-painting projects can be a lot of fun, and sometimes the collective wisdom produces ideas you wouldn’t have thought of on your own.
— Michael Frye
Related Posts: A Night in the Alabama Hills; Bodie at Night
Michael Frye is a professional photographer specializing in landscapes and nature. He is the author or principal photographer of The Photographer’s Guide to Yosemite, Yosemite Meditations, Yosemite Meditations for Women, Yosemite Meditations for Adventurers, and Digital Landscape Photography: In the Footsteps of Ansel Adams and the Great Masters. He has also written three eBooks: Light & Land: Landscapes in the Digital Darkroom, Exposure for Outdoor Photography, and Landscapes in Lightroom: The Essential Step-by-Step Guide. Michael has written numerous magazine articles on the art and technique of photography, and his images have been published in over thirty countries around the world. Michael has lived either in or near Yosemite National Park since 1983, currently residing just outside the park in Mariposa, California. Visit Michael’s blog for more photography tips and tutorials.


Michael…What type of flashlight were you using?
Thanks
I linked to it above Rob, but here it is again:
https://www.amazon.com/gp/product/B016O0E1GS/ref=oh_aui_detailpage_o05_s00?ie=UTF8&psc=1
Michael,
Interesting!
Cheers,
Alyn
Thanks Alyn!
Nice work, Michael – I agree, the collaborative effort can sometimes produce a terrific result! Thanks for being willing to state that it’s not just your answer as the ‘right’ answer, but that of the group, or another individual’s idea, that makes for an even more right answer!
Thanks Brenda. As much as I would like to think that I have all the answers (at least when it comes to photography), it turns out that everyone has ideas and imagination! Shocking news, isn’t it? 🙂 Sounds like you were at the same (or similar) talk by Dewitt Jones as I was. Great stuff.
Micahel….extraordinary vision. You mentioned that you combined three exposures in the top photo. Can you share the exposures, particularly the flashlight photo? Thanks for your time.
Thanks John. There were actually four exposures combined here. The exposures for the Milky Way and the flashlight beam were the same: 20 seconds at f/4, 8000 ISO. The light from the right and the flashlight lighting the underside of the arch were both 20 seconds at f/5.6, 800 ISO. I don’t think knowing the exposure for the light beam will help you though unless you have the same light.
Thanks Michael. Ironically I do have the same light. I’ve always found it difficult to measure exposures for lights that have a tremendous amount of latitude. This helps. Gracias
Love them all… all of my picks but one were in the top 10 (or 11), but my favorite (#15) didn’t even make the list. I still like the patterns in the clouds… … wondering what this next Atmospheric river of a storm will bring in the way of Michael Frye photos…
Thanks Bob! I won’t be adding any photos of the next storm from Yosemite, since the park is closed. 🙁