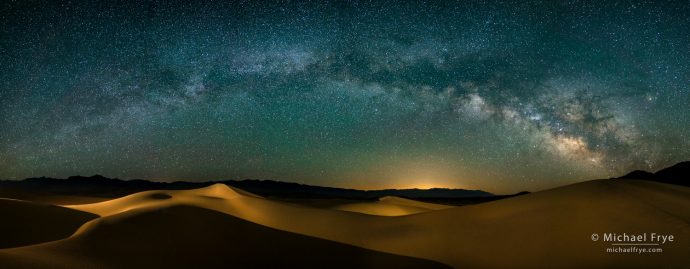
Milky Way over sand dunes, Death Valley. This is a six-image panorama, lit with low-level continuous lighting from two LED light panels on stands, and stitched together with Lightroom’s Panorama Merge. See the main text for more details.
It’s been a busy spring, so I have a backlog of images that I haven’t been able to post yet. Among those images are most of the nighttime photos I made during our two Death Valley workshops (as well as beforehand, while scouting). We encountered a lot of wind, which made things challenging. You just don’t want to be out in the dunes when it’s windy, because you and your gear will get sand-blasted. But the wind helped wipe footprints off the sand, and somehow, during both workshops, we managed to get out into the footprint-free dunes on calm, clear, beautiful nights.
The panorama above was created by stitching together six separate frames. I turned the camera to a vertical orientation, with my 20mm Rokinon lens, to make sure I had enough vertical spacing to include the top of the Milky Way as well as the dunes below. When making panoramas, day or night, I always make sure I have at least a 50-percent overlap between frames. How do you see that in the dark? By picking out a bright star near the middle or edge of the frame. If, for example, I’m capturing the panorama sequence from left to right, I could find a star on the right edge of the frame in the first shot, then move that star to the middle of the frame for the next image. Or, I could find a star in the middle of the first frame, then move that star to the left edge for the second exposure.
We set up continuous, low-level lighting for this scene. I used two LED light panels with amber filters, and placed them on cheap, lightweight tripods. The main light was just out of the frame to the left, raking across the dunes. The second was actually behind the dune on the right, adding a bit of fill light to the right side of the dunes in the middle and on the left. I adjusted the light output of the LED panels to expose the dunes properly with typical Milky-Way settings on the camera – that is, 15 or 20 seconds at f/2.8 and 6400 ISO, or any equivalent exposure. (I actually used 20 seconds at f/2.5 at 5000 ISO for each image in my panorama.)
This kind of low-level lighting for nighttime photos has become increasingly popular over the last few years. Advocates point out that the light levels are low enough to allow people to keep their night vision, and don’t interfere with other people’s enjoyment of dark skies in popular places. On the other hand, “traditional” light painting with a hand-held flashlight has many practical and creative advantages over continuous, low-level lighting. There’s less equipment to buy and carry (just a flashlight, rather than multiple LED panels and stands). Light-painting also allows you to have more control over exactly what the light hits, and doesn’t hit. In addition, with a brighter light you can overpower the ambient light and do the lighting on separate frames, which gives you more control over the intensity and color of the lighting, and also makes it possible to light a scene from many different angles with just one light. And with a moving, hand-held flashlight you can actually step into the scene while lighting it, yet keep yourself and the flashlight invisible in the photograph, making many interesting creative effects possible. This image, for example, would never have been possible with light panels on stands – nor would I have been able to make this one.
But it’s very difficult to light the foreground of a panorama with a hand-held flashlight. You’d have to light the scene the same way for each frame that you intend to stitch together, which is pretty impractical if you want to get the light off-camera (which you usually should), and virtually impossible if you want light coming from more than one direction. So for panoramas, continuous, low-level lighting offers a great solution. Once the lights are set up the lighting will stay consistent from frame to frame, allowing you to move the camera and capture a panorama sequence. The biggest challenge is figuring out how to light a broad area in an interesting way, while keeping the lights themselves out of the picture.
So which is better: light-painting with a hand-held flashlight, or continuous, low-level lighting with LED panels on stands? Neither. They both have advantages and disadvantages, and both have their place. It’s nice to have choices, and anyone serious about lighting landscapes at night should learn how to do both. (For more information about low-level lighting you can start with this article. For light-painting, I recommend my friend Lance Keimig’s book Night Photography and Light Painting. Also, at the bottom of this page, under “Related Posts,” I’ll link to some of my posts that give detailed descriptions of how I lit certain images.)
Below you’ll find a few more images I made at night in Death Valley this past spring, with extended captions to explain how they were made. In one I used a hand-held flashlight; in two others I set up continuous lights on stands. The rest were made with natural moonlight.
In each of our workshops we pulled virtual all-nighters. We headed out to the dunes before the moon rose to capture images with the Milky Way, then photographed the moon rising, then made images of the dunes lit by moonlight. And when the dawn started to brighten the sky, and wash out the moonlight, we thought what the heck, we may as well stay for sunrise.
Being out in the dunes for hours under the stars and moon was peaceful, serene, and beautiful. I love the dunes at any time, but at night they’re just magical.
— Michael Frye
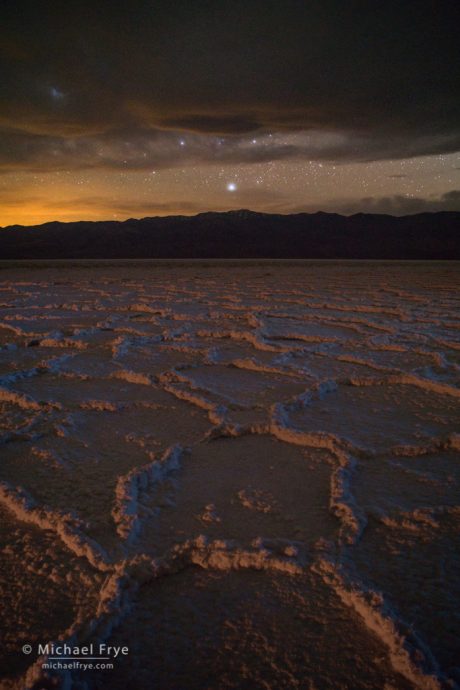
Salt flats at night, Badwater, Death Valley. The hardest part about making this photo was finding the right patch of the salt flats, with ridges high enough to catch some light. The final image is a blend of three exposures: one for the stars (20 seconds at f/2.8, 6400 ISO), one for the lighting from the left, and one for the lighting from the right (both 30 seconds at f/4, 1600 ISO). I used my 20mm Rokinon lens, and a hand-held flashlight for the lighting.
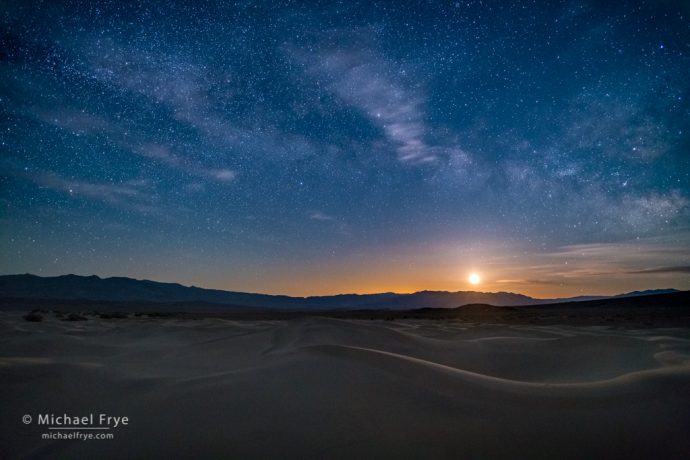
Moon rising over the Mesquite Flat Dunes, Death Valley. A brighter moon would have washed out the stars, but here the moon was only about 30-percent full, allowing the stars to show clearly. (20mm Rokinon lens, 15 seconds at f/2.8, 5000 ISO).
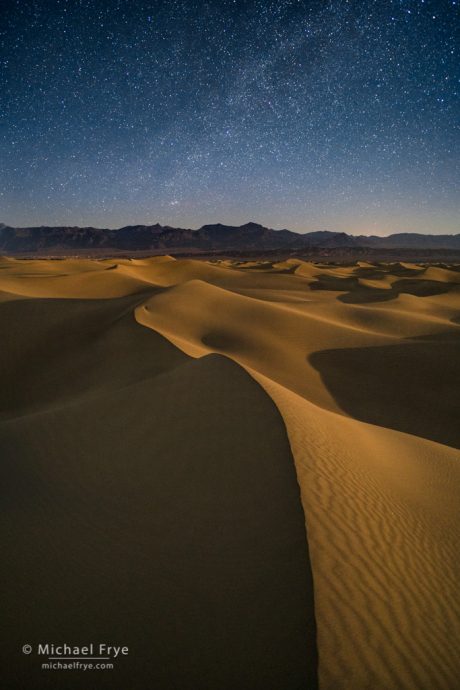
Moonlight on sand dunes underneath the Milky Way, Death Valley. After the moon rose we photographed the dunes lit by low-angle moonlight. This was just like photographing the dunes under low-angle sunlight, but with longer exposures, and stars above. (20mm Rokinon lens, 20 seconds at f/2.5, 5000 ISO)
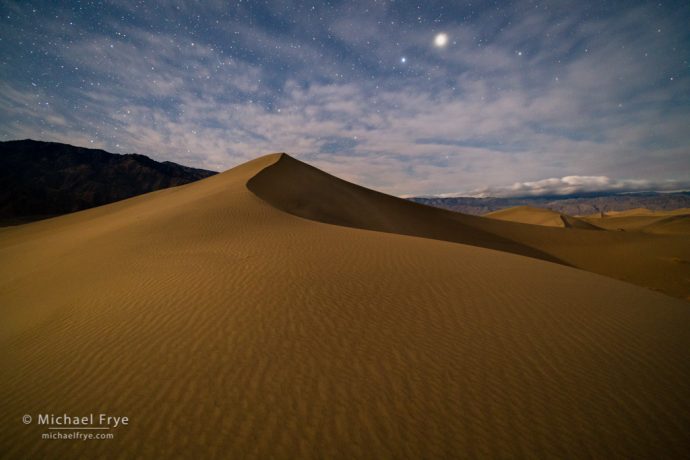
Moonlit sand dune and Jupiter, Death Valley. Another view of moonlit dunes, this time looking west toward Jupiter. (20mm Rokinon lens, 20 seconds at f/2.8, 6400 ISO.)
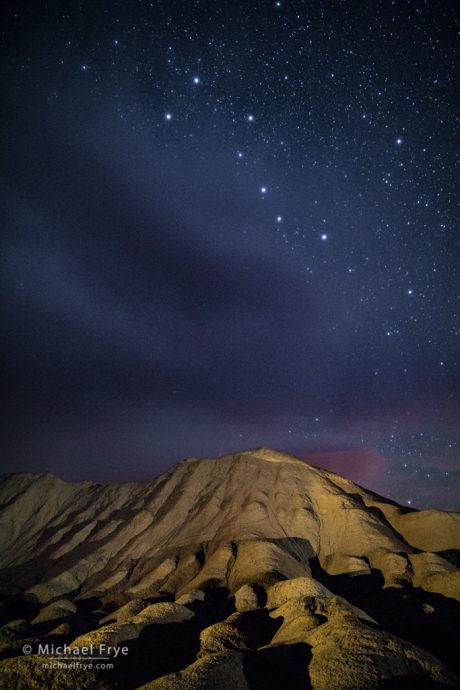
Twenty Mule Team Canyon with the Big Dipper, Death Valley. We set up continuous, low-level lighting for this scene too, so that our workshop group could photograph this view without coordinating exposures for light-painting. (Rokinon 20mms lens, 20 seconds at f/2.5, 5000 ISO.)
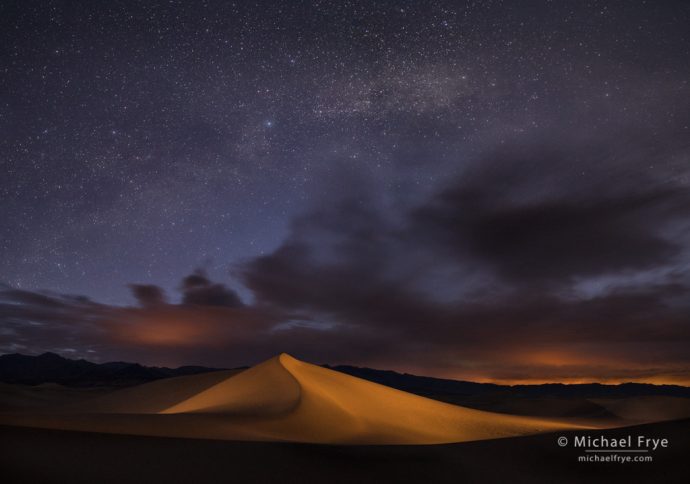
Sand dune and Milky Way, Death Valley. I made this image on a scouting trip before our workshops. My original intention was to make a panorama, so I set up continuous, low-level lighting on this dune. This time, however, I used two Fenix FD40 flashlights, rather than LED panels. The Fenix lights have five different brightness settings, with an adjustable beam, and the light is beautifully even when the beam is at its widest. They even have a tripod thread. These lights are expensive, however (about $100 each), and their native color is cool and slightly greenish, so you have to filter them. Here I used orange gels over each light, and set them to light the central dune from each side, and highlight the dune’s curving ridge. This final image is actually only part of a stitched panorama, as I ended up liking this section of the panorama better than the whole thing. (Rokinon 20mm lens, each frame 20 seconds at f/2.8, 3200 ISO.) When I returned to this spot less than two weeks later, this dune was completely gone! Some big wind storms had thoroughly reshaped the dunes.
Related Posts: Downtown Bodie; Bodie at Night; Tufa and Milky Way
Michael Frye is a professional photographer specializing in landscapes and nature. He is the author or principal photographer of The Photographer’s Guide to Yosemite, Yosemite Meditations, Yosemite Meditations for Women, Yosemite Meditations for Adventurers, and Digital Landscape Photography: In the Footsteps of Ansel Adams and the Great Masters. He has also written three eBooks: Light & Land: Landscapes in the Digital Darkroom, Exposure for Outdoor Photography, and Landscapes in Lightroom: The Essential Step-by-Step Guide. Michael has written numerous magazine articles on the art and technique of photography, and his images have been published in over thirty countries around the world. Michael has lived either in or near Yosemite National Park since 1983, currently residing just outside the park in Mariposa, California.


Wow. Those are just amazing shots. Bringing the dunes into star shots is really an awesome combination. Kudos for the creativeness Michael. I love them.
Thank you John!
Michael, fantastic panorama! Gear Question for you, for landscape is it really worth investing in any 2.8 glass? Already have the Sony 16-35 f4… It’s been great. With Sony just announcing the g master 16-35 2.8 ( heavier) would you bother? I just can’t see where I’d use 2.8 aperture in a wide angle… At least not for most of my shooting. i am sure the g master is even sharper, but sharpness isn’t everything. Thanks
Thanks Nelson. F/2.8 lenses could be worth it if you’re doing night photography, but otherwise I’d say no. I also have the Sony 16-35 f/4. It’s not perfect, but very good, and probably the lightest and most compact full-frame wide-angle zoom around. But I may get the 16-35 f/2.8 at some point for night photography.
Michael, thanks for the feedback. I may skip it for now since I have the f4… and go for a 70-200 instead. I find myself using a 24-70 often… But occasionally I need to pick out distant areas and need a bit more reach. Thanks!
Well worth losing sleep over!
Indeed – thanks Monika!
Michael, stunning stuff, man!
Thanks Johnny!
just beautiful
Thank you Tom!
Michael, just stunning captures. Liting up dunes under MW, speechless.
Thank you Ravi!
Michael, my jaw dropped when I saw the image at the top of this post and continued to drop further as I viewed the images below. These images are really astonishing. I love the colors and the juxtaposition of the light-painted and moonlit dunes with the star-filled skies. I’ve wanted to try astrophotography and your post has convinced me. I coming to the U.S. this week and will be spending time with my family in the Sierra Nevada in Plumas County. I’ve ordered a 12mm f/2.0 Rokinon lens and will be using it with my Fuji X-T2; the full frame equivalent of this lens is 18mm, so it should work for shooting the stars. Again, many thanks this information-filled post and the lovely images.
Thanks Bob. I’m glad you got inspired to do some night photography, and hope your experiments are successful.
Good Morning Michael
Beautiful night images. Especially the six slice pano. I like panorama images and I use image composition (ICE).
Thank you for sharing these this morning.
Roger
Thanks Roger!
Spectacular series! Get some BIG wall space ready.
Thank you Chuck!
Dear Mr.Frye: I came across these shots very much by accident. Having spent many many wonderful days and nights in the desert I have to say you have captured it’s naturally breathtaking beauty. I have lost the majority of my sight over the years (only 2% left in one eye today), but was shocked/moved almost to tears when my equipment projected these images on my screen. Beautiful work and I thank you for the memories so well presented here.
My very best regards and thanks, just wonderful
Marsh
Thank you so much Marsh – I really appreciate the kind words!
Michael,
Amazing!
Cheers,
Alyn
Thank you Alyn!
Having just completed a couple of photography classes at my local community college I have gained a better understanding and appreciation for lighting (strobes, continuous, different colors and temps, etc) so the first image here really caught my attention. Then I started reading the descriptions on the following images. Amazing! Now I need to get out and experiment! Thank you for always sharing and teaching!
Thank you Elena!
Just curious Michael, how early in the morning to you shot these beautiful images.
Randy P.
Amazing photos as always, Michael. I have a couple of question about the top vertical pano. I’ve always used the traditional handheld light and painted when shooting the milky way. From the perspective here, it looks like the light stands were pretty far away — but since you had such a wide angle lens, I’m guessing they’re probably not as distant as they seem. Was there a lot of trial and error getting the light placement and intensity right? Also, are you still using the Sony mirrorless camera?
Thanks Rich. Actually the left-hand light was just out of the frame, feathered toward the sky to try and minimize light falloff. The light on the right, as I mentioned here, was behind the dune to the right. There wasn’t really a lot of trial and error involved here, but I have a lot of experience with lighting, and I talked with my assistant Robert Eckhardt via radio to get his input on the lighting placement, direct, and intensity. Yes, I’m still using Sony. My main camera is the a7R II and my backup is the a7R.