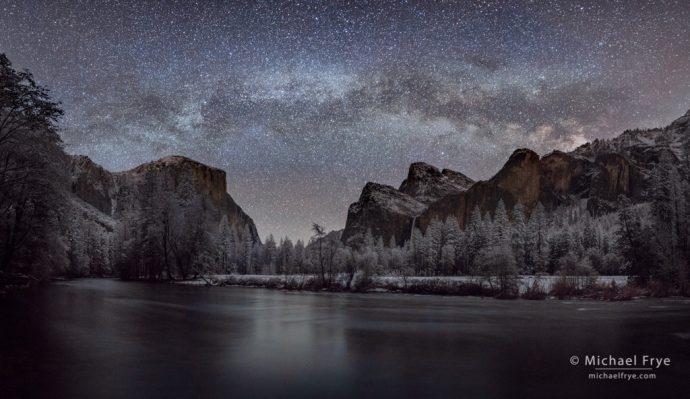
Milky Way over Yosemite Valley. Four frames stitched together with Lightroom’s Panorama Merge. Each frame was 30 seconds at f/2.5, ISO 6400.
Sometime around the middle of April a small weather system passed through our area, dropping about half an inch of precipitation on Yosemite Valley. In typical fashion, the temperature dropped toward the end of the storm, and rain turned to snow in the valley.
I kept my eye on the weather, as usual, and it became obvious that this small storm wouldn’t clear before sunset. It looked like it would clear sometime during the night, but it was hard to tell exactly when. My best guess, based on the radar and satellite images, was that it would clear sometime between midnight and 2:00 a.m. Should I grab a couple hours of sleep first, or stay up? Or just skip the whole thing and get a good night’s sleep?
Around 10:00 p.m. I realized that the storm was starting to clear sooner than I expected. Like right now. I hurriedly packed clothes, food, and camera gear, and made the hour-long drive up to Yosemite Valley. When I got there I found a couple inches of snow on the ground, and only a few shreds of mist. Maybe I arrived too late for the mist, or maybe it was too cold, so there never was much mist. In any case, I was there, with snow on the ground and stars in the sky, so there had to be something to photograph.
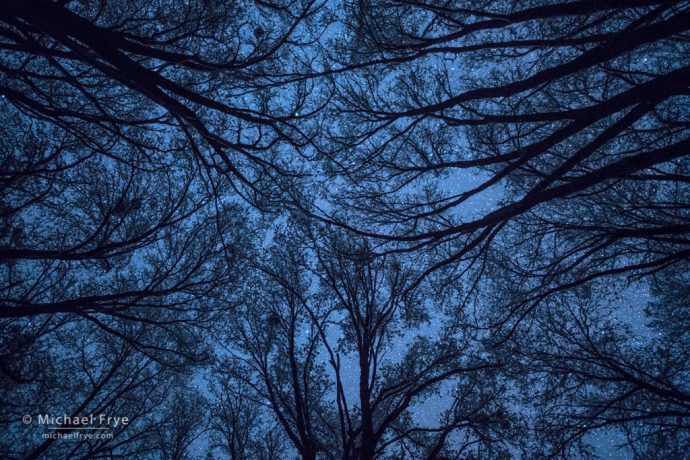
There was no moon that night, and it occurred to me that the Milky Way would be rising around 2:00 a.m. But that was still a couple hours away, so I headed to one of the oak groves and made some photographs looking up through the trees at the stars. I spent about an hour there, trying different compositions, and ended up with one or two images I liked. Here’s one:
Then I drove back to Gates of the Valley (aka Valley View), and found the Milky Way just starting to rise above the cliffs. I spent another hour there, capturing panoramas of the stars, cliffs, river, and snowy trees. My favorite panorama is shown at the top of this post. It’s four vertical images made with my Rokinon 20mm lens and stitched together with Lightroom’s Panorama Merge.
Many people are surprised to learn that it’s possible to stitch nighttime images together like this. How does the software align and stitch everything seamlessly when there’s at least a 45-second interval between exposures and the stars are moving? Honestly I don’t know the answer to that. It seems like it shouldn’t work, but it does. Or at least it usually does.
It helps to leave plenty of overlap between frames; that gives the panorama-stitching software bigger areas to match up and align, and more room to stretch and bend things when necessary. Day or night I always try to leave at least a 50% overlap. More can be even better, but the more the frames overlap the more exposures it takes to complete the panorama, which means the sequence will take longer, leading to more star movement, and a greater chance that car headlights will mess everything up. So I try to make the overlap right around 50% – no more, no less.
Of course it’s hard to see anything through the viewfinder at night, so I use bright stars to guide my compositions. If I’m going from left to right I’ll look for a bright star near the right edge of the frame in my first shot, then move that star to the middle for the second exposure. Or find a star in the middle, and move it to the left edge. And so on.
The Milky Way kept climbing higher, and eventually I couldn’t fit both the Milky Way and river into a vertical frame anymore. That meant either capturing and stitching two rows together, or declaring victory and going home. I chose the latter. Needless to say, I didn’t get much sleep. But it’s always fun to be out in the wee hours of the morning, when the often-bustling valley is quiet and still.
— Michael Frye
P.S. Happy Mother’s Day to all the moms out there!
Related Posts: Sand and Stars; Misty Moonrise; A Clearing Storm by Starlight
Michael Frye is a professional photographer specializing in landscapes and nature. He is the author or principal photographer of The Photographer’s Guide to Yosemite, Yosemite Meditations, Yosemite Meditations for Women, Yosemite Meditations for Adventurers, and Digital Landscape Photography: In the Footsteps of Ansel Adams and the Great Masters. He has also written three eBooks: Light & Land: Landscapes in the Digital Darkroom, Exposure for Outdoor Photography, and Landscapes in Lightroom: The Essential Step-by-Step Guide. Michael has written numerous magazine articles on the art and technique of photography, and his images have been published in over thirty countries around the world. Michael has lived either in or near Yosemite National Park since 1983, currently residing just outside the park in Mariposa, California.


Great stuff Michael. Thanks for giving up your sleep for us. 😉
Anytime John. 🙂
Very beautiful photograph of `la via lactea` Michael.
Thanks Martin!
Wonderful photos!
Thank you Patty!
Love the panoramic!
Thanks Nelson!
Awesome photos as always.
Thank you Gabor!
Excellent article and photos. I like reading about your thought process and internal dialog. Thanks.
Thanks Michele – glad you enjoyed the story!
Beautiful image, Michael. It is so glorious to see Yosemite Valley bathed in starlight. Many thanks! I also enjoyed the info about taking and stitching panoramas—very helpful.
Thanks Bob – glad you found that the information helpful!
You always amaze me with your images, passion and the dedication it takes to create these gorgeous images. Thanks for sharing. Since these were not blended images of different exposures for sky and foreground (I assume), how did you know you had enough light (on a moonless night) so that the granite peaks didn’t just become black silhouettes?
Thanks John. It’s easy to tell whether you have detail in shadows, day or night, by looking at the histogram. And I’ve also photographed snowy scenes on moonless nights with the same settings.
Great info and images as always, Michael.
Thanks Brenda!
First I have to say I missed meeting you while I was in Yosemite for the Yosemite Renaissance show opening. I had a piece there. I admired your piece and the show that you had at the Ansel Adams gallery I was reading your night photography blogs and tried some of your tips and camera settings on my recent trip to Big Bend. Somewhat successful with a couple of images. The difficulty I have is looking at the night image in the camera after exposure and deciding if it is exposed properly. Hence I would like to see the in camera or unprocessed image from an expert like you to help me judge my workflow.
Marek
Sorry I missed you too Marek. Congrats on getting into the exhibit – I liked your piece.
Regarding your question, I don’t think looking at a section of one of my images will be much help. Why? Because looking at the image on the back of the camera in the field isn’t much help in judging exposure – partly, at least, because the image on the back of the camera looks different than what you see on the computer. Maybe if I could show you the image on the back of my camera that might help, but my camera’s LCD is probably different than yours, so that probably wouldn’t really help. How you judge what’s on the back of the camera also depends on the brightness of your camera’s LCD; I set my LCD brightness low at night.
The bottom line is that a histogram is a much, much, much, much, much, much, much, much better way of judging exposure in the field. Even then, however, I go largely by experience for images lit just by starlight. I use the histogram and blinkies for judging exposures for light painting, and for moonlit scenes. With only starlight, I use 20 seconds at f/2.8, ISO 6400, or something close to that – for the sky. If I’m not adding any light to the foreground, then I may do a second exposure for the foreground. For that, it’s almost impossible to overexpose a foreground that’s only lit by starlight. So the more light you give it, the better. The only restriction is the time you want to spend waiting for a long exposure to finish.
So having said all that, here’s a link to a section of the Milky Way from Gates of the Valley photo at Adobe’s default settings in Lightroom:
https://www.michaelfrye.com/0218-16071-2/
I’ve included the histogram with this. You can see that, although there’s a big spike near the left edge, most of the pixels are not touching the left edge, which shows that there is shadow detail – though just barely. This looks similar to the histogram on my Sony a7R II for an image like this, but I’ve stood at night next to photographers with different cameras whose histograms looked quite different, even though we were using the exact same settings. That’s why I’m not sure a histogram is the best guide for starlight exposures, at least with some cameras. It’s helpful, yes, but I rely more on experience, as I said.
What a wonderful tutorial. It seems like reading it gave me a much betters vision of what I need to do. Thanks for posting a link and histogram. This is exactly what I was hoping to see. Let’s see if I can put it into practice later this summer When I will be in Yellowstone. Thank you so much for taking time to reply. And the little thing about turning down camera display how come I never thought about that.