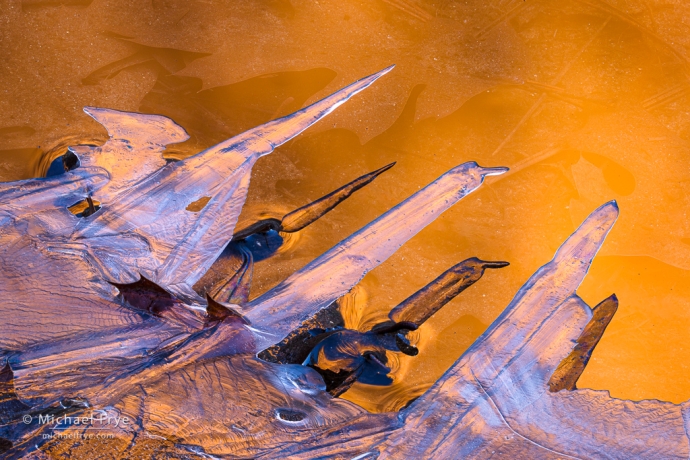
Ice fingers, Yosemite NP, California. 400mm, 1 second at f/16, ISO 100; 18 focus-stacked frames blended with Helicon Focus Pro. I needed to photograph this detail at an angle to get the orange reflections, requiring focus-stacking to get everything sharp. (It’s a reflection of a cliff lit by the setting sun.)
Last Thursday, Friday, and Saturday two smaller storms moved through the Sierra, bringing rain and higher-elevation snow. But for a couple of weeks before that it had been dry and warm – reaching the upper 60s at our house in Mariposa.
Early last week, as we were starting our workshop in Yosemite Valley, temperatures cooled off a bit, allowing ice to form along the banks of the Merced River. It’s always fun to photograph ice like this, with its beautiful patterns, designs, and colors. But it can be challenging, both technically and creatively.
I think the creative challenge is mostly about finding strong, effective compositions. With any subject I’m often urging workshop students to simplify and tighten up their compositions – to figure out what’s essential, and pare the photograph down to that. What’s catching your eye the most? How can you eliminate everything else but that, so the remainder has maximum impact? With ice it seems even more important to get in close. Really close. The smallest details are often the most compelling.
And any composition – whether of a big scene or a small detail – is more effective if it has a strong design. That means emphasizing repeating patterns, or interesting lines or shapes. It means creating a design in the photograph, rather than just presenting a subject.
I think some photographs are more subject-driven, but design still plays a vital supporting role. Other photographs are less about the subject itself, and more about design, light, and (maybe) color. I think ice often falls into that latter category; the best ice photographs are not so much about the ice itself, but about the patterns and designs in the ice.
The technical challenge with ice is getting it all in focus. It’s relatively easy to get everything in focus when looking straight down on the ice, so that the ice is parallel to the film or sensor. But in Yosemite Valley, I’m often looking for situations where the ice is in the shade, reflecting sunlit cliffs across the valley. Those sunlit cliffs create beautiful gold or even orange reflections in the ice or surrounding water. However, you won’t see those colors looking straight down, where the ice is reflecting the sky directly above; you only see those colors at an angle, looking toward the reflection of a cliff. And because you’re trying to pick out a small, interesting detail with a long lens, the depth of field is very shallow. Even at f/16 or f/22 it’s impossible to get everything in focus with one frame in those situations. So that means focus-stacking.
Luckily, the ice usually isn’t moving, making focus-stacking easier. Many newer cameras have automated focus-stacking (often called “focus bracketing” in the camera menu). You can focus on the closest thing to the camera (usually at the bottom of the frame with ice images), activate the automated focus bracketing, and the camera will take a series of images at farther and farther focus distances. (You still have to figure out the right settings for this: the increment and number of frames.)
If you don’t have automated focus-stacking you’ll have to do it manually. Start by focusing on the closest part of the scene to the camera (again, usually at the bottom of the frame with ice images), and then focus a little farther back, then a little farther back again, and so on, until you’re focused on the farthest objects the picture. You can do this with manual focus, or by moving your autofocus point to different places in the frame.
It’s possible to use a fairly wide aperture for this, like f/8. But the wider the aperture, the less depth of field, and the less focus overlap between frames, so you’ll need to capture many more frames to get everything in focus from front to back. I prefer to stop down the aperture to f/16 so that I can use fewer frames, which takes less time, occupies less space on my hard drives, and reduces the chances for error. (If there’s not enough overlap there’ll be a gap where part of the image isn’t in focus on any frame.)
You can use Photoshop to blend a focus-stacking sequence, but I much prefer the Pro version of Helicon Focus. (It’s on sale right now. No, I don’t get a commission.) In many situations, Helicon Focus does a better job than Photoshop of blending the images – of selecting the sharpest frame for each part of the photo. The Pro version also has retouching, which can be useful for eliminating ghosting with moving subjects. Best of all, the Pro version allows you to export images from Lightroom to Helicon as DNGs, then save the resulting blended image as a DNG. So you can process that blended DNG like any other raw file, with all the power and flexibility that provides.
Despite the challenges, I love photographing ice. It’s just water, the most abundant substance on our planet’s surface – but water turned into natural crystals, with beautiful patterns and textures that reflect the colors of the world. It’s wonderful stuff.
— Michael Frye

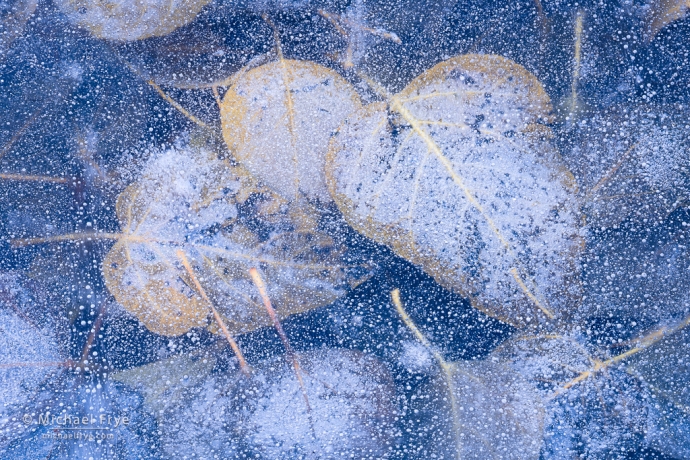
Cottonwood leaves encased in ice, Yosemite NP, California. 247mm, 1 second at f/16, ISO 100; Seven focus-stacked frames blended with Helicon Focus Pro. This was looking more straight down, but still at an angle, requiring focus-stacking to get everything sharp.

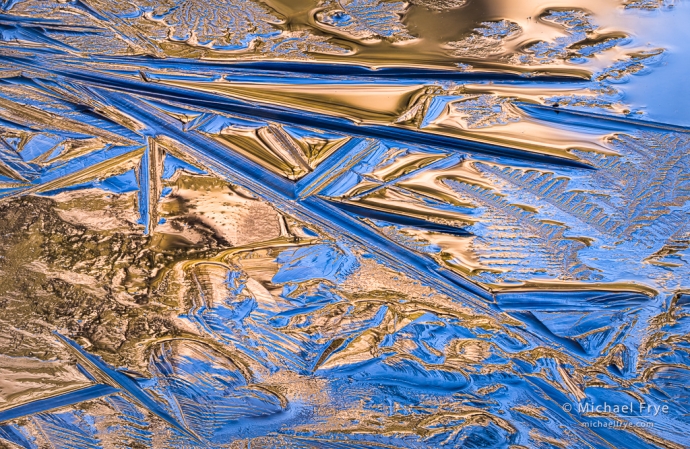
Ice and reflections, Yosemite NP, California. 400mm, 1/3 sec. at f/16, ISO 100; 34 focus-stacked frames blended with Helicon Focus Pro. I positioned the camera low to the ground (maybe 18 inches high) to get the gold reflections. Looking across the ice at such a low angle required many frames to get it all in focus.
Related Posts: Focus-Stacking Season; Melting Ice
Michael Frye is a professional photographer specializing in landscapes and nature. He lives near Yosemite National Park in California, but travels extensively to photograph natural landscapes in the American West and throughout the world.
Michael uses light, weather, and design to make photographs that capture the mood of the landscape, and convey the beauty, power, and mystery of nature. His work has received numerous awards, including the North American Nature Photography Association’s 2023 award for Fine Art in Nature Photography. Michael’s photographs have appeared in publications around the world, and he’s the author and/or principal photographer of several books, including Digital Landscape Photography: In the Footsteps of Ansel Adams and the Great Masters, and The Photographer’s Guide to Yosemite.
Michael loves to share his knowledge of photography through articles, books, workshops, online courses, and his blog. He’s taught over 200 workshops focused on landscape photography, night photography, digital image processing, and printing.


These ice pictures are magnificent Michael. Unusual as well.
Thanks very much Kathy!
Very nice Michael. The ice fingers look like jets in space. Is diffraction ever a concern at f/16?
Thanks John! Yes, diffraction is a concern at f/16, but not as much as many people seem to think. Yes, if you’re pixel-peeping and comparing sharpness at f/8 vs. f/16 you’ll notice a difference. But that difference is easy to compensate for by adding more sharpening in software, and would hardly be noticeable in a print – even a large print, and even when sticking your nose up to it. And in my view, the only relevant measurement for sharpness is how the image looks in a large print, as large prints are the only time subtle differences in sharpness are visible. I discuss all this in more depth in this blog post:
https://www.michaelfrye.com/2017/11/05/image-sharpening/
Terrific! Inspiring for me. I appreciate your comments as well since I intend to try stacking. I bought Helicon Standard Edition to use with Capture One.
Thanks Sam! I highly recommend getting the Pro version!
Hi Michael, I really like the Cottonwood leaves in ice, it looks so pretty!
Have a wonderful Christmas and Happy New Year to you and your family!
Thanks Randy – I was pretty happy to find that composition, and I’m glad you like it. Merry Christmas and Happy New Year to you as well!
Spectacular!
Thanks Glenn!