We had a wonderful time during our Starry Skies Adventure workshop last week. We managed to dodge the fires and had four clear, smoke-free nights. It was a really nice group, and photographing under a sky full of stars is always such a great experience.
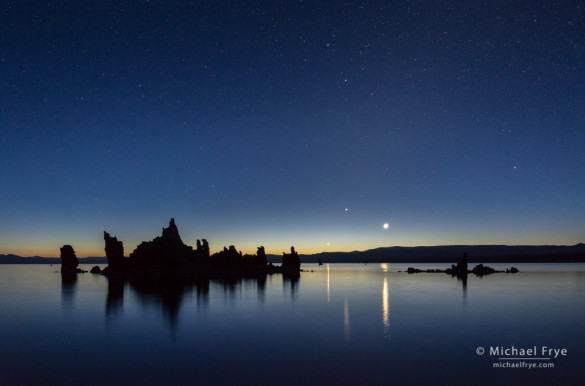
One of the highlights of the workshop was viewing and photographing a dawn alignment of Venus, Jupiter, and the Moon over Mono Lake last Saturday. It’s hard to convey how gorgeous this was in a photograph, but you’ll find my best attempt above.
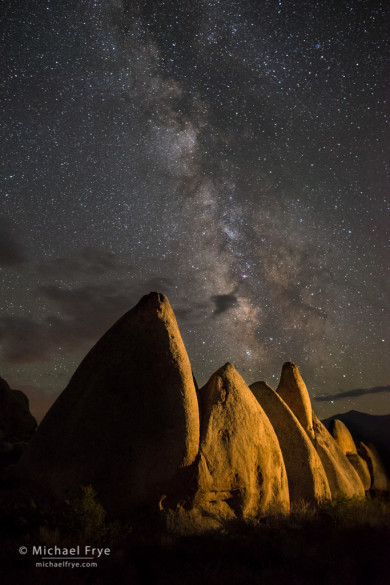
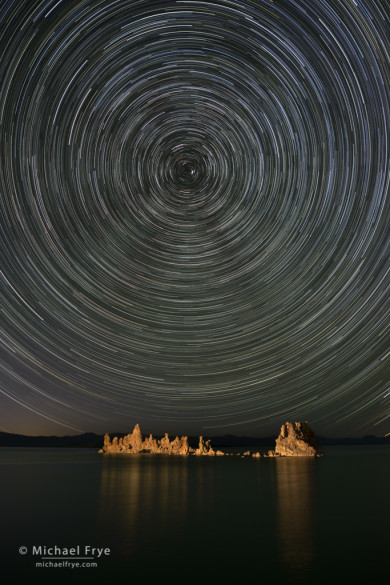
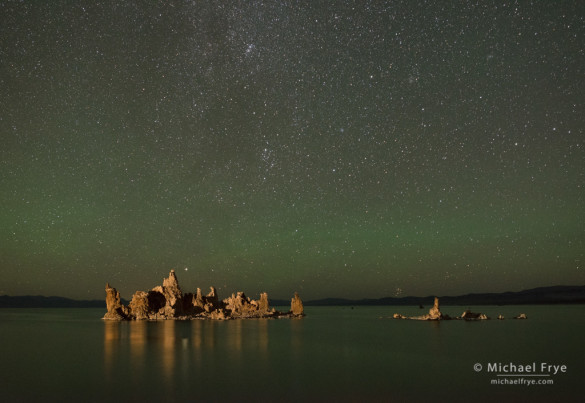
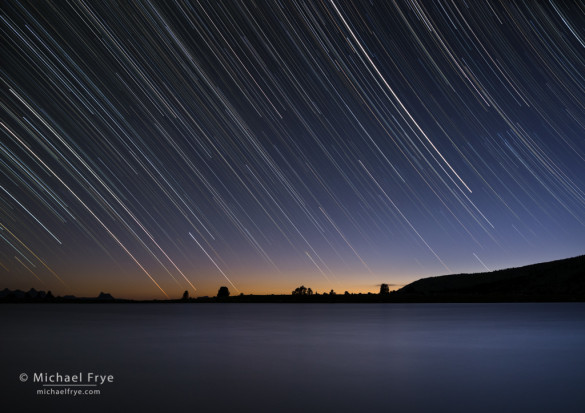
We also photographed star trails and the Milky Way, and went to Bodie on our last night. I’ll save the Bodie images for a later post, but you’ll find a selection of other images from the workshop below.
One of these photographs shows a distinct band of green airglow (or nightglow) over Mono Lake. When I first noticed this green hue in some of my star photographs I thought it was a quirk in the way my camera rendered night skies. But I’ve since come to learn that it’s a common atmospheric phenomenon. We can’t see the green color with our eyes, just like we can’t see the color in a lunar rainbow, or the Milky Way, because the color-sensitive cones in our retinas don’t work at low light levels. But the color is there, and cameras can record it. When looking at a sequence of photos (like the individual frames of a star-trail sequence) when airglow is present, you can see the green streaks shifting and moving through the sky. When airglow forms distinct patterns it can be quite beautiful, though at other times it just adds an unpleasant green cast to photographs. (For more information about airglow, here’s a link to the Wikipedia article, and another interesting article on Universe Today.)
In previous posts I’ve talked about software tools for figuring out the position of the sun and moon in relation to the landscape. One that I’ve been using for a long time is The Photographer’s Ephemeris, and I should to mention that the desktop version of this program is becoming a web app. The web app has all the same functions of the desktop app, and is still free. (The iPhone, iPad, and Android versions are $8.99.) The desktop version of TPE will stop working on September 2nd, so if you have any saved locations you should transfer them to the web app before then.
The Photographer’s Ephemeris won’t show you the location of the Milky Way, but there are a couple of apps that will. PhotoPills (iPhone only, $9.99) has many similar features to TPE, but includes several others that TPE lacks, including a new tool that shows the arc of the Milky Way, and the azimuth and elevation of the galactic center (the brightest part of the Milky Way). I’ve already used this feature extensively, and it’s quite useful. Here’s a screen shot showing the Milky Way over South Tufa at Mono Lake, on August 22nd at 9:36 p.m. The thick white line shows the angle of the galactic center:
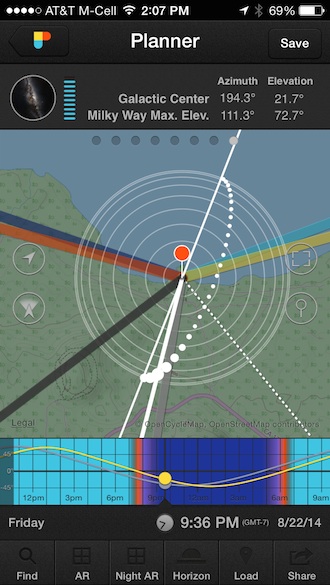
Screenshot of PhotoPills showing the arc of the Milky Way, with the thick white line pointing to the galactic center
Star Walk (for iOS) is another useful app for visualizing the position of the Milky Way, and will also show you the movement of stars, planets, and even comets (something The Photographer’s Ephemeris and PhotoPills won’t do). With StarWalk, you can hold your phone up toward the sky to identify stars, planets, and constellations. You can also advance the clock to see a movie of the sun, moon, planets, and Milky Way moving through the sky. Star Walk won’t show you the moon or Milky Way in relation to a map, or features of the landscape, but it’s still very helpful for visualizing the position and movement of celestial objects. Here’s a screen shot of the sky looking east on Saturday morning (the same time as the photograph at the top of this post):
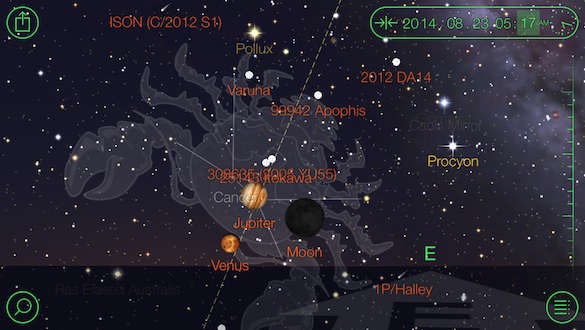
Star Walk screenshot, showing the position of Venus, Jupiter, and the moon on the morning of August 23rd
The Milky Way is visible on any clear, moonless night, away from city lights. Unfortunately none of these apps make it immediately obvious when the moon might be too bright. You have to figure that out by looking at the phase of the moon, and whether the moon is above the horizon at a particular time. That’s not difficult to do with any of these apps, but it’s an important step to remember.
Also, if you use these apps (or any other tool) to gauge the position of the Milky Way, you’ll notice that in the northern hemisphere the galactic center (again, the brightest part of the Milky Way) is only visible to the south (between southeast and southwest), and only from late winter through late fall. The galactic center is highest in the sky, and visible for the longest period of time, around the summer solstice. If you travel too far north the galactic center isn’t visible at all; it’s below the horizon to the south. (Besides, at northern latitudes it never gets dark enough to see the Milky Way in summer.) David Kingman’s ebook Nightscape has an excellent chapter on understanding the night sky, plus lots of good technical information about capturing and processing Milky Way photos.
With daytime photographs I like to be spontaneous, and let the weather and light dictate where I go. But nighttime photography takes more planning. I’ve been using PhotoPills and Star Walk to plan a several future nighttime images, and if any of these schemes work I’ll be sure to post the photographs here. In the meantime, good luck with your own planning!
— Michael Frye
Related Posts: Stars Over Three Brothers; Moonstruck
Did you like this article? Click here to subscribe to this blog and get every new post delivered right to your inbox!
Michael Frye is a professional photographer specializing in landscapes and nature. He is the author or principal photographer of The Photographer’s Guide to Yosemite, Yosemite Meditations, Yosemite Meditations for Women, and Digital Landscape Photography: In the Footsteps of Ansel Adams and the Great Masters. He has also written three eBooks: Light & Land: Landscapes in the Digital Darkroom, Exposure for Outdoor Photography, and Landscapes in Lightroom 5: The Essential Step-by-Step Guide. Michael written numerous magazine articles on the art and technique of photography, and his images have been published in over thirty countries around the world. Michael has lived either in or near Yosemite National Park since 1983, currently residing just outside the park in Mariposa, California.



I can see why this workshop was a great adventure…very starry, magical, and ethereal. Looking forward to seeing your photos of Bodie, too! I always learn something new from your blogs. Thank you.
Thank you Ann – I’m glad you enjoy the posts. I’ll post the Bodie photos soon. 🙂
Forgot to ask….have you ever held a workshop in Death Valley National Park? (Spring time, of course!)
No, not so far, but it could happen sometime.
Very nice subjects in your foreground. Definitely adds spice to the night shots. Great choices and thanks for sharing. Bob
Thanks very much Bob!
Great pictures and very interesting article! The green sky is a surprise to me! Michael, if you could advise… Sony has amazing 135mm Zeiss prime, but 70200 is a more convenient one. From your experience, is having fixed 135 too much of disadvantage? Can’t afford both. Thanks for your input.
Thanks Bart! I’ve been using a 70-200 for years, but have never used a 135 prime. So I can’t really tell you whether using the 135 is a disadvantage, or how much of a disadvantage it is. A lot depends on how sharp the 70-200 is, and how much weight matters to you.
Thank you for the input Michael! I care more about final image then weight and the 135 zeiss is such sharp beast that I don’t want to take it off my camera. But i worry that not being able to zoom might be too much disadvantage for landscape 🙁 I guess I have to toss a coin.
Great shots. I especially like the Tufa and Star Trails shot. That must have taken a lot of patience. And thanks, once again, for all the info. I didn’t know TPE was changing their desktop platform.
You’re welcome Kevin, and thank you!
The star trails over Mono Lake picture is awesome. I am heading there in a few weeks and was wondering, did you use a light to paint the Tufa for that shot. Was that a single exposure or several?
Thanks Brad. Yes, I lit the tufa in that image. That was 30 exposures, four minutes each.
Thanks for the info. Your photos are amazing and very inspiring.